Tuesday, August 30, 2011

A use for Photoshop's Polar Coordinates filter

In a recent Photoshop training session at a manufacturing client, they had some artwork that they needed to "wrap" around a roughly-cone-shaped vase. They had the artwork below, which shows the artwork as you would see it looking at the side of the vase.

However, their vendor wanted the artwork supplied as it would look viewed straight up from the bottom of the vase. They wanted the artwork to appear like this:


The client had tried numerous solutions to no avail. They had tried some of the 3d features of Photoshop Extended, but while good for creating a package mockup, that wasn't exactly what they needed. Here is how we solved the problem:

1. Choose Image > Canvas Size, and make the canvas as tall as it is wide.

2. Select the image, and use Edit > Free Transform to stretch the image to fill the new canvas.


3. Choose Filter > Distort > Polar Coordinates, and choose the Rectangular to Polar option, and click the OK button.

That's all there is to it!

Monday, August 22, 2011

Sharing folios with Adobe DPS

One of the great features of Adobe Digital Publishing Suite is the ability to share folios that you create with a select audience of reviewers, approvers and collaborators. Here are a few things you need to know about this.

1. When you share a folio, you will be prompted to enter the email addresses of those with whom you wish to share the folio. The email address that you enter here MUST be the email address that the person used to sign up for their Adobe ID. In other words, if you routinely correspond with "John" at john.johnson@acme.com, but when John signed up for his Adobe ID he used his gmail address jjohnson@gmail.com, you will need to share the folio with the gmail address.

This requires you to ask your collaborators for the email address they used for their Adobe ID, OR they will need to create a second Adobe ID to correspond to the email address you share the folio with.

2. If you want to see who you've shared a folio with, select Unshare from the Folio Builder panel menu. This will present you with a dialog box listing all the email addresses you've shared a folio with. You can then just click the Cancel button, and the shares will remain untouched.

3. adobe.com/membership is the best place to create new Adobe IDs, to test your Adobe ID to see if it works, or to change your Adobe ID password.

Monday, August 15, 2011

Clean text in InDesign

I first wrote about Text Cleaner way back in 2007 on this blog. Text Cleaner is a cool Macintosh program that makes it easy to "clean" text of multiple spaces, double hyphens, multiple tabs, line breaks, etc. It's a standalone application, but will clean the text you have selected in InDesign, InCopy or Quark without screwing up the formatting.

Alas, this handy app was never updated to work beyond InDesign CS2. But I just received notice from the developer that they've finally updated it to work with InDesign/InCopy CS3 - CS5.5, as well as Mac OSX 10.4 to 10.7.

You can download the pre-release version here, which is free and will work until 10/1/2011.

I really like this app, and used it heavily back in the days of InDesign CS2. In addition to working with text in InDesign, InCopy and Quark files, it will clean text on the clipboard or in a text file.


An alternative to Text Cleaner is the excellent Multi-Find/Change for InDesign from my friend Martinho da Gloria. This cool plug-in lets you string together and save sets of multiple InDesign find/change queries for quick recall. Highly recommended also!

Friday, July 29, 2011

InDesign template resources

Starting an InDesign layout from a template can be useful in many ways. They can be a way for an inexperienced InDesign user to create a complex project quickly. Deconstructing a well-designed template can be a good way to learn more about InDesign. Templates can be a useful way for non-designers to take advantage of someone else's good design sense. They can even be useful for experienced designers who need to create a project very quickly with a very low budget. Here are five sources for InDesign templates:

1. Your hard drive: If you have InDesign CS3 or CS4 installed, choose File > New > Document From Template. This will launch Adobe Bridge, and a directory full of templates that come with InDesign will be displayed. If you no longer have CS3/CS4 installed, the templates may still reside on your hard drive in Hard drive/Library/Application Support/Adobe/Templates/en_US/InDesign (Mac) or Program Files/Common Files/Adobe/Templates/en_US/InDesign (Windows).

2. InDesignSecrets.com: Adobe stopped including templates after InDesign CS4. But InDesignSecrets received permission from Adobe to post all the templates on InDesignSecrets.com.

3. The InDesign Ideabook by Chuck Green is a CD-ROM/Book that contains 315 high-quality templates. Nicely designed with Chuck's clean and simple style, these templates are all well-constructed.

4. Stocklayouts is a resource for templates that are highly designed for specific uses, such as a golf tournament brochure, a brew pub menu, and an accounting services brochure for example. Stocklayouts include high-resolution, royalty-free artwork.

5. GraphicRiver is a "micro stock" site for templates. The templates here are user-submitted, and generally sell at a low price. Since the templates are user-submitted, the design quality (and presumably the file construction) varies in quality.

Tuesday, July 19, 2011

Book recommendation

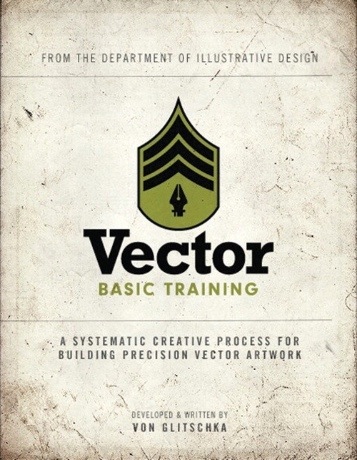
The last few days I've been perusing "Vector Basic Training: A Systematic Creative Process for Building Precision Vector Artwork" by Von Glitschka. Anyone who is serious about learning how to do vector illustration better in Adobe Illustrator needs this book.

The core objective of the book is to help designers and illustrators build vector artwork more precisely and accurately. A secondary purpose is to encourage designers to draw, draw and draw. The book is filled with lots of examples of the author's work, with specific notes on the processes used to create them. Included is a DVD with four hours of screencasts as well as example source files.

If you want to become a Jedi master of Bezier curves, get this book!