Monday, December 19, 2011

DPS app design spotlight: Van Gogh's Dream

(This is the fourth in an intermittent series of posts highlighting interesting or innovative apps built using Adobe Digital Publishing Suite.)

Van Gogh's Dream is an amazing piece of work. If you have any interest in the work of Vincent van Gogh, this is a must-have. But even if you don't, it is well worth the $10 to see the design, organization, and interface concepts used very effectively in this app.

The designers did so many things well. I'm only going to highlight a couple of things here. First, I like the way they used Unibody 8, a "screen type" for areas where very small type is needed. At the iPad's 132 pixels per inch resolution, it is difficult to render extremely small type clearly. Using fonts that don't employ any anti-aliasing (sometimes known as "bitmap" fonts) such as Unibody 8 or one of the fonts in the Minifonts line is a good idea. In the screenshot below, I've highlighted the use of Unibody 8 with yellow.

Screen1


Another innovation that I like in this app is the Table of Contents and Help screens. The TOC does a nice job of giving the user a "birds-eye" view of how this complex, content-rich app is organized. I like the way it gives the user a feel for how much content is in each section at a glance.

Screen2


When you tap the "Show the User's Guide" button, instead of a typical DPS help screen, you get a "full-size" replica of the DPS interface elements, with helpful explanations pointing to each icon.

Screen3


Spend some time exploring this cool app, and I'm confident you'll discover many other good DPS design ideas!


Monday, December 05, 2011

DPS app design spotlight: Chased By The Light

Apple just approved our latest iPad app, Jim Brandenburg's Chased By The Light. Lynn Phelps (Phelps Design) did the design, I did the technical production. This app is derived from the popular coffee table book of the same name. The RGB photos look stunning on the iPad...surpassing the best CMYK printing. We used InDesign and the new Adobe Digital Publishing Suite Single Edition to create the app.

The app contains video commentary, where Jim discusses how and why he took some of the shots. Throughout the book, we wanted the photography to be big, beautiful, and to take center stage. We didn't want video elements and icons to clutter up the screens. We also wanted the user to be able to view the photo while the video was playing.

If a particular photo has an accompanying video, there is a small "v" icon in the bottom left corner. When a user taps the "v" icon, the video plays in a 320px by 240px area in the bottom left corner. How did we do this?


Photo 1


Photo


The trick is to create a transparent "poster frame". We created a 320px by 240px PSD file in Photoshop that contains the white "v" icon artwork on a transparent background. We then used this mostly-transparent file as the "poster frame" for the video. You can choose a poster frame file for DPS video using the Media panel.

Mediapanel


Wednesday, November 23, 2011

DPS app design spotlight: U of Dayton Viewbook

(This is the second in an intermittent series of posts highlighting interesting or innovative apps built using Adobe Digital Publishing Suite.)

Kudos to the designers who produced the University of Dayton Undergraduate Viewbook app. This free, vertical-orientation-only iPad app is a "viewbook" for prospective undergraduate students, intended to give them a feel for the campus, programs and values of the University of Dayton. If you are interested in learning what works well in an iPad app I'd encourage you to download this app and explore it. Here are a few things I like:

On the first screen after the video cover screen, you'll see the simple screen below, This doesn't appear in the screen shot, but the sidebar "We believe that life is to be experienced" rotates through several "We believe..." statements every 3 seconds or so. This is a nice, subtle use of the DPS slideshow feature with "Auto Play" specified.

Photo

I like the mechanism they designed for revealing facts and tidbits of information, as shown in the bottom of the screen shot below. This is done with InDesign buttons and a multi-state object.

Photo

In the side-by-side screen shots below, the Images change in place when the buttons are tapped while the copy remains static. Simple to execute in InDesign/DPS, yet a nice way to present multiple views without adding extra screens.

Photo3ab

This is a nice use of vertically scrolling text in the blue sidebar.

Photo

Here's a nice example of a graphic illustrating the distance from U of Dayton to various destinations in the U.S. Again, this is just buttons and a multi-state object. Note also the "top" button to take the user back to the top of the article--a nice touch.

Photo5

This app contains an abundance of other tasteful interactivity. Remember, the point of interactivity in an app like this is to engage the reader and make the app "sticky" so the user spends more time learning about the University. I think that the U of Dayton succeeded in spades with this app.

Thursday, November 17, 2011

Still on CS4 or older? Adobe announces upgrade policy for CS6.

In a recent blog post Adobe announced pricing for Creative Cloud, which, among other things will offer subscription pricing for Creative Suite products.

But also in this blog post is the folowing nugget:

"With regards to upgrades, we are changing our policy for perpetual license customers. In order to qualify for upgrade pricing when CS6 releases, customers will need to be on the latest version of our software (either CS5 or CS5.5 editions). If our customers are not yet on those versions, we’re offering a 20% discount through December 31, 2011 which will qualify them for upgrade pricing when we release CS6."

So, if you don't think you'll be enrolling in Creative Cloud, but prefer a perpetual license, it might be smart to upgrade to CS5.5 while you can.

Wednesday, November 16, 2011

DPS app design spotlight: Nat Geo slide show

(This is the first in an intermittent series of posts where I plan to highlight interesting or innovative apps built using Adobe Digital Publishing Suite.)

National Geographic is doing some interesting things in their DPS apps. A couple different photo treatments in the November 2011 issue of National Geographic Magazine caught my eye today. These are nice examples of breaking out of the box of the usual "photos stacked on top of each other" metaphor.

Photo

Photo 1

Several things I want to point out about this example:

1. Note how the portrait and landscape images along with the associated captions "wrap" around the image thumbnails, rather than just presenting the slides and captions in a fixed-size "box" above or beside the thumbnails. This is possible in DPS because buttons can appear above multi-state objects, as long as the buttons have both a normal state and a click state.

2. The image thumbnails are not just shrunken, hard-to-recognize versions of the larger photos. The designer has cropped out a small, recognizable detail of the larger photo.

3. The "click" state of each thumbnail has a light blue stroke, so the user can tell which image is currently displayed.

4. The DPS "Swipe to change image" option is active, so the user can swipe across each image instead of clicking on the thumbnails. Personally, I wouldn't activate this feature when so much of the screen is occupied by the multi-state object. When "Swipe to change image" is active, the user can't swipe across the image to move to the next screen. I think this will inevitably confuse users. To Nat Geo's credit, they added a right-pointing arrow icon in the upper-right corner to prompt the user to swipe there, instead of in the image area.

Here's another interesting example:

Photo 2

Photo 3

While this example looks complex, it is just multi-state objects activated by buttons. Because of the way things overlap, it's just a little harder to set up. I like the way the background is partially obscured by a gray box when the photo is enlarged.

Production hint: Since a multi-state object in DPS cannot contain an actual, working button, the visible show and hide buttons are actually "dead" artwork that are part of the hidden/visible states of the multi-state object. Drawn on top of each these icons is a frame with no fill or stroke that is made into a button with a "Go to State" action.

Wednesday, November 02, 2011

InDesign section numbering shortcuts

InDesign's Numbering & Section Options dialog box is useful for changing the starting page number of a file, changing page numbering in the middle of a file, changing the page numbering style, and more. The obvious way to access this useful dialog box is to choose Layout > Numbering & Section Options. But there are two sneaky ways to access this dialog box that are easier and faster in many situations.

Sneaky method 1: Double-click on the down-pointing black triangle that appears above the start of a section in the pages panel. If you need to start a new section, select a page in the Pages panel and then right-click or ctrl-click on the page, and choose Numbering & Section Options from the context menu.

Sneaky method 2: If you are working with an InDesign Book file (File > New > Book), double-clicking on the name of an InDesign file in the Book panel opens that InDesign file. But double-clicking on the page number range to the right of the InDesign file name opens the InDesign file, and then automatically opens the Numbering & Section Options dialog for that file.

Monday, October 17, 2011

A peek at things to come?

I had the good fortune to attend Adobe MAX 2011 two weeks ago in Los Angeles. My head is stuffed full of all kinds of new stuff that I learned at this amazing event.

A highlight of the conference was the "Sneak Peek" presentations, where Adobe engineers shared bits of technology that "may, or may not, make it into future versions of Adobe products."

These amazing sneak peeks have now been posted here for anyone to view.

Don't miss "Image Deblurring", "Local Layer Ordering" and "InDesign Liquid Layout". Cool!

Saturday, October 15, 2011

Compressing video for use in DPS

Use the following checklist to ensure that video content is optimized for tablet apps you create with Adobe Digital Publishing Suite (DPS).

[ ] Save the video in .mp4 format with .h264 encoding

[ ] Scale and crop the video to the exact size that you want it to play in your DPS app before placing it in InDesign. Do not scale or crop video content in InDesign.

[ ] Video compression is always a tradeoff between playback quality and file size. Compress the video as aggressively as possible while still maintaining the quality you desire. Video that is larger than necessary greatly impacts the size, and thus download speed, of DPS apps.

[ ] Consider whether you want the video to play full screen or in a smaller window alongside other page elements. DPS allows you to configure video either way. But creating video that looks good full screen will result in a larger file than video that runs in a smaller window. Think about your content...if the video is just a "talking head" perhaps full screen isn't necessary.

Adobe Media Encoder is included with both Mac and Windows Adobe InDesign. This program lets you convert, crop, resize and compress video. The number of options available to you in this program can be daunting to people that aren't video pros.

As one who has a very limited knowledge of the world of video, I've had really good luck using the free, open source program Handbrake to convert, resample, and compress video for use in DPS. I've found it easier to choose correct, repeatable settings than with the Adobe Media Encoder.

Monday, September 26, 2011

DPS: Stop a video at the last frame

A technique being used by many publishers of content-rich tablet apps such as magazines is to have a video play on the cover or the first page of a feature, and then have the video "freeze" at the last frame. This can be done using Adobe Digital Publishing Suite. Johannes Henseler first documented the basics of this clever workaround. I'm going to provide a little more detail to help you make the video transitions seamless.

1. Create the video using your preferred tools for video or animation. Adobe After Effects is a good tool for this. If you want the headline and body copy of the article to appear while the video is playing, include that in each frame of the video. Save the video as an mp4 file with h264 encoding, compressed as small as possible.

2. Open the mp4 video in Adobe Photoshop.

3. Use the Animation (Timeline) panel to scrub to the first frame of the video.

4. (THIS STEP IS NO LONGER NECESSARY WITH iOS 5. iOS 5 FIXED THE EXPOSURE CHANGE PROBLEM WHEN VIDEOS PLAY IN DPS) Choose Image > Adjustments > Brightness/Contrast. Fill in the dialog exactly as shown below, and click OK. On the iPad, whenever a video is played in DPS, there is a noticeable exposure change. This sets this first frame to match the exposure of the playing video exactly.

5. Choose File > Save As, and save the first frame of the video as a JPEG image, with Image Quality: High.

6. Use the Animation (Timeline) panel to scrub to the last frame of the video.

7. Choose Image > Adjustments > Brightness/Contrast. Fill in the dialog as shown in step 4.

8. Choose File > Save As, and save the last frame of the video as a JPEG image, with Image Quality: High.

9. Place the mp4 video in InDesign, and position it on the page as desired.

10. With the video selected, set the video settings in the Overlay Creator panel as shown below.

11. BEHIND the video, place the JPEG files for the first and last images that you saved in steps 5 and 8. Be sure these are perfectly aligned with the video.

12. Select both JPEG files, and convert them to a Multi-State object by clicking on the Convert selection to multi-state object button at the bottom of the Object States panel.

13. In the Multi-State Objects panel, select the JPEG image that represents the first frame, and name it "start" and name the other image "end". Make sure that the "start" state is at the top of the panel, and is selected.

14. With the multi-state object selected, fill in the Slideshow options in the Overlay Creator panel exactly as shown below.

Here's why all this is necessary. If you only include the video, and not the multi-state object, a white screen will flash briefly before the video plays, and when the video is done playing, it will disappear and all that will remain is a white screen. The multi-state object fixes this. The first "state" of the multi-state object will appear briefly before the video plays. Then it will be replaced by the video. While the video is playing, after 2 seconds the multi-state object will advance and display the last state. But since the video is still playing, you won't see the multi-state object advance. When the video is finished, it disappears, revealing the last state of the multi-state object.

Thursday, September 15, 2011

Image resolution for iPad publishing

Don't miss this post I just wrote for InDesignSecrets:

What is the minimum image resolution required when designing for the iPad? The answer might surprise you...

Wednesday, September 14, 2011

Photoshop Extended for DPS

If you are planning creating apps with Adobe InDesign and Adobe Digital Publishing Suite, I strongly recommend that you have Adobe Photoshop CS5 Extended in your tool set. Here's why.

If you're not aware, Adobe Photoshop CS4 and newer comes in two "flavors": Photoshop and Photoshop Extended. Both versions are exactly the same in every way, except that Photoshop CS5 Extended has some extra features specifically for:

1) 3D image creation, editing, and painting
2) Motion graphics editing
3) Scientific image analysis.

If you're creating Apps with Adobe Digital Publishing Suite, you'll probably be including video in some capacity. Yes, Adobe After Effects, Adobe Premiere Pro, and Adobe Media Encoder all are wonderful tools for working with video, if you know how to use them. But Photoshop is a tool that most of us are reasonably adept with. So it's really nice that Photoshop CS5 Extended has some features for working with video and animation.

Specifically, here are some tasks that I've used Photoshop Extended for recently on DPS app projects:

* Extracting the last frame of a video sequence and saving it out as a JPEG. This is a necessary step with DPS if you want to make a video appear to stop on the last frame.

* Saving each frame of a video clip to a separate, sequentially numbered JPEG file to use with the DPS image sequence feature.

* Cropping a completed video to a new aspect ratio to better fit a DPS screen layout.

If you have Creative Suite Design Premium, Web Premium, Production Premium, or Master Collection, you have Photoshop Extended. If you have Creative Suite Design Standard, you only have Photoshop. Information on how to upgrade can be found here.

Tuesday, August 30, 2011

A use for Photoshop's Polar Coordinates filter

In a recent Photoshop training session at a manufacturing client, they had some artwork that they needed to "wrap" around a roughly-cone-shaped vase. They had the artwork below, which shows the artwork as you would see it looking at the side of the vase.

However, their vendor wanted the artwork supplied as it would look viewed straight up from the bottom of the vase. They wanted the artwork to appear like this:


The client had tried numerous solutions to no avail. They had tried some of the 3d features of Photoshop Extended, but while good for creating a package mockup, that wasn't exactly what they needed. Here is how we solved the problem:

1. Choose Image > Canvas Size, and make the canvas as tall as it is wide.

2. Select the image, and use Edit > Free Transform to stretch the image to fill the new canvas.


3. Choose Filter > Distort > Polar Coordinates, and choose the Rectangular to Polar option, and click the OK button.

That's all there is to it!

Monday, August 22, 2011

Sharing folios with Adobe DPS

One of the great features of Adobe Digital Publishing Suite is the ability to share folios that you create with a select audience of reviewers, approvers and collaborators. Here are a few things you need to know about this.

1. When you share a folio, you will be prompted to enter the email addresses of those with whom you wish to share the folio. The email address that you enter here MUST be the email address that the person used to sign up for their Adobe ID. In other words, if you routinely correspond with "John" at john.johnson@acme.com, but when John signed up for his Adobe ID he used his gmail address jjohnson@gmail.com, you will need to share the folio with the gmail address.

This requires you to ask your collaborators for the email address they used for their Adobe ID, OR they will need to create a second Adobe ID to correspond to the email address you share the folio with.

2. If you want to see who you've shared a folio with, select Unshare from the Folio Builder panel menu. This will present you with a dialog box listing all the email addresses you've shared a folio with. You can then just click the Cancel button, and the shares will remain untouched.

3. adobe.com/membership is the best place to create new Adobe IDs, to test your Adobe ID to see if it works, or to change your Adobe ID password.

Monday, August 15, 2011

Clean text in InDesign

I first wrote about Text Cleaner way back in 2007 on this blog. Text Cleaner is a cool Macintosh program that makes it easy to "clean" text of multiple spaces, double hyphens, multiple tabs, line breaks, etc. It's a standalone application, but will clean the text you have selected in InDesign, InCopy or Quark without screwing up the formatting.

Alas, this handy app was never updated to work beyond InDesign CS2. But I just received notice from the developer that they've finally updated it to work with InDesign/InCopy CS3 - CS5.5, as well as Mac OSX 10.4 to 10.7.

You can download the pre-release version here, which is free and will work until 10/1/2011.

I really like this app, and used it heavily back in the days of InDesign CS2. In addition to working with text in InDesign, InCopy and Quark files, it will clean text on the clipboard or in a text file.


An alternative to Text Cleaner is the excellent Multi-Find/Change for InDesign from my friend Martinho da Gloria. This cool plug-in lets you string together and save sets of multiple InDesign find/change queries for quick recall. Highly recommended also!

Friday, July 29, 2011

InDesign template resources

Starting an InDesign layout from a template can be useful in many ways. They can be a way for an inexperienced InDesign user to create a complex project quickly. Deconstructing a well-designed template can be a good way to learn more about InDesign. Templates can be a useful way for non-designers to take advantage of someone else's good design sense. They can even be useful for experienced designers who need to create a project very quickly with a very low budget. Here are five sources for InDesign templates:

1. Your hard drive: If you have InDesign CS3 or CS4 installed, choose File > New > Document From Template. This will launch Adobe Bridge, and a directory full of templates that come with InDesign will be displayed. If you no longer have CS3/CS4 installed, the templates may still reside on your hard drive in Hard drive/Library/Application Support/Adobe/Templates/en_US/InDesign (Mac) or Program Files/Common Files/Adobe/Templates/en_US/InDesign (Windows).

2. InDesignSecrets.com: Adobe stopped including templates after InDesign CS4. But InDesignSecrets received permission from Adobe to post all the templates on InDesignSecrets.com.

3. The InDesign Ideabook by Chuck Green is a CD-ROM/Book that contains 315 high-quality templates. Nicely designed with Chuck's clean and simple style, these templates are all well-constructed.

4. Stocklayouts is a resource for templates that are highly designed for specific uses, such as a golf tournament brochure, a brew pub menu, and an accounting services brochure for example. Stocklayouts include high-resolution, royalty-free artwork.

5. GraphicRiver is a "micro stock" site for templates. The templates here are user-submitted, and generally sell at a low price. Since the templates are user-submitted, the design quality (and presumably the file construction) varies in quality.

Tuesday, July 19, 2011

Book recommendation

The last few days I've been perusing "Vector Basic Training: A Systematic Creative Process for Building Precision Vector Artwork" by Von Glitschka. Anyone who is serious about learning how to do vector illustration better in Adobe Illustrator needs this book.

The core objective of the book is to help designers and illustrators build vector artwork more precisely and accurately. A secondary purpose is to encourage designers to draw, draw and draw. The book is filled with lots of examples of the author's work, with specific notes on the processes used to create them. Included is a DVD with four hours of screencasts as well as example source files.

If you want to become a Jedi master of Bezier curves, get this book!

Monday, July 11, 2011

Locking objects in InDesign CS5 or newer

Adobe changed the way the Lock feature works in InDesign CS5. I think the change is a huge improvement, but there are a few subtleties that you need to be aware of.

1. The new Lock is a "true" lock. When an object is locked, you can't do anything with it, unlike the previous "lock position" command in previous versions.

2. You can lock objects 5 different ways: a) Object > Lock, b) command-L (Mac) or ctrl-L (Windows), c) by clicking in the lock column to the left of the object in the Layers panel, d) by clicking in the lock column to the left of the parent layer of the object in the Layers panel (which locks all the objects on that layer) e) by hiding a layer (which effectively "locks" the objects on the layer, since the objects can no longer be selected).

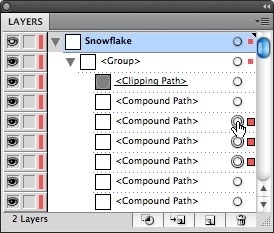
3. You can unlock objects 5 different ways: a) Object > Unlock All on Spread (which unlocks all the objects on the currently selected spread), b) command-option-L (Mac) or ctrl-alt-L (Windows), (which also unlocks all the objects on the currently selected spread), c) by showing Frame Edges (View > Extras > Show Frame Edges), and then clicking on the padlock icon in the upper-left corner of the frame, d) clicking on the padlock icon to the left of the object in the Layers panel, e) by clicking on the padlock icon to the left of a layer name in the Layers panel (which unlocks all the objects on that layer, unless individual objects on the layer have been previously locked).

4. If an object is locked, but the lock icon in the upper left corner of the object doesn't display when frame edges are shown, that means that the parent layer is locked. To unlock the object in this situation, you must unlock the parent layer by clicking the lock icon to the left of the layer name in the Layers panel.

5. If an object is locked and the lock icon is displayed in the upper left corner of the object, but nothing happens when you click on it, this means that the object is locked AND the parent layer is locked. To unlock the object, you must unlock the parent layer by clicking the lock icon to the left of the layer name, AND unlock the object by clicking the lock icon to the left of the object name in the Layers panel.

6. Surprisingly, the Object > Unlock All on Spread command will, indeed, unlock ALL objects, even those on hidden layers (but not objects on locked layers). In other words, a hidden layer isn't considered "locked" for the context of this command.

Wednesday, June 29, 2011

Online sidecar.xml generator

When creating tablet apps with the Adobe Digital Publishing Suite, using a sidecar.xml file is an efficient way to enter article metadata such as title, description and author. As an added bonus, it also makes it easy to order/reorder articles within a Folio.

However, creating this sidecar file is left to the user, either typing it in the proper xml format by hand, or entering the data into a spreadsheet and then tagging and exporting the spreadsheet to xml as I've been doing.

Now there's a much simpler way. Johannes Henseler has created the online sidecar.xml generator. This useful site lets you enter information for each article, and then export that as a valid sidecar.xml file. The information you enter can be saved, so you can return to the site later to change the information and generate a new sidecar file. Sweet!

Tuesday, June 21, 2011

The Text Edits tool is MIA in Acrobat X

The best way to make editorial comments in versions of Adobe Acrobat prior to version 10 (version X) is with the Text Edits tool, located in the Commenting toolbar. With this single commenting tool you can indicate that text should be deleted, replaced, inserted, highlighted, or have a note attached.

But look high and low in Acrobat X, and you'll be disappointed. In the Annotations panel you'll see separate tools for deleting, replacing, inserting, highlighting, or adding a note to text. But the handy all-in-one Text Edits tool is nowhere to be found.

As it turns out, they've merged the functionality of the TextEdits tool in Acrobat X with the Selection tool.

Just select some text with the Selection tool, then ctrl-click (Macintosh) or right-click (Windows) and choose Highlight Text, Cross Out Text, Replace Text, or Add Note to Text from the context menu that appears.

Once you know about the functionality of the Selection tool, you won't miss the Text Edits tool. But it's sure disconcerting when a familiar workflow is turned on its head!

Friday, June 10, 2011

Interesting iPad content apps

Here are a few interesting iPad "content" apps I've run across recently. You should look at these if you are interested in publishing content such as periodicals, graphically rich interactive books, annual reports, etc. to iPads and other tablets.

•••••

These first 6 apps were developed using Adobe InDesign and the Adobe Digital Publishing Suite:

The Ampersand: A cool look at ampersands from a variety of typefaces created by Chris Gregory. (Rotate your iPad to switch between roman and italic ampersands.)

Mascord Living Spaces: Note the use of 3D image rotation on the house plan pages, as well as pinch and zoom capability on the floor plans.

Fuel Magazine: The landscape orientation is used as a "teaser" for the full content which is displayed in the portrait version.

NCMA Rodin: Interesting navigation menu system at the top of the screen, and a 30 minute high-quality embedded video.

IU Libris: A good example of an "aggregation app" that serves up the various publications produced by the institution. See the IUPUI Alumni Digital Magazine in the app for an interesting navigation system.

AnimalABCLite: Note the "flip" animation on each page. This is done with an HTML5 animation "overlay".

•••••

Above & Beyond: Created with Adobe InDesign and the Digital Magazine Tools from WoodWing. A well-designed look at the photography of George Steinmetz.

•••••

Good Food Magazine: A highly-interactive, searchable foodie magazine created with PressRun.

•••••

Our Choice: The iPad version of a book by Al Gore. Created by pushpoppress. You've got to check this out as an example of a highly interactive book. Lots of interactive charts and illustrations, nice image treatments and an interesting interface. According to the web site, it was "two years in the making!" so obviously not inexpensive to develop.

Monday, June 06, 2011

iOS 5 Newsstand

Today Apple announced iOS 5 for the iPad, iPhone and iPod touch. Among the shiny new features that will be in this version of the operating system is Newsstand, where "iOS 5 organizes your magazine and newspaper app subscriptions." There will also be a "new place on the App Store just for newspaper and magazine subscriptions."

iOS 5 is a ways off...it's supposed to ship this fall. There aren't many specifics available yet. But looking at screen shots, I see example publications that are created with the Adobe Digital Publishing Suite and Mag+, as well as custom apps like The Daily. So presumably this will work with magazine and newspaper apps built with a variety of systems.

This is a long-anticipated and welcome addition to the periodical publishing landscape. For tablet publishing to be successful, users need a central location to find and discover periodicals that suit their interests.

Thursday, June 02, 2011

Really nice DPS example

I'd like to introduce you to a neat iPad app that was created by one of my training clients...Lerner Books. After just a couple of hours of training and a bit of guidance along the way, one of their top designers was able to convert their Journey into the Deep print title into a really great looking iPad app using Adobe InDesign CS5 and the Adobe Digital Publishing Suite.

The designer did a great job on this book. The photography is gorgeous, she added some nice navigational and interactive elements, and included some bonus video elements as well. The vertical navigation within each chapter reinforces the idea of "diving" into the ocean depths

Download this book if you want to see an excellent example of a non-fiction book created with Adobe DPS.

Friday, May 27, 2011

InDesign's ruler "zero point"

Barb wrote and asked:

"I’m guessing I did something inadvertently. I’m setting up a new large project. The (single) page size is 8.5” wide. I’m setting it up as facing pages and I want the ruler to be set at 8.5” (in the middle) when at the start of the second page – instead it shows up as 0” and goes to 8.5” again. In other words I want the ruler to read from 0” to 17” for the facing pages spread. What do I need to do to change this?"

Short answer: Just right-click (or ctrl-click) on the horizontal ruler, and choose "Ruler Per Spread".

Long answer:

"Ruler Per Page" will position the zero point at the upper-left corner of each individual page.

"Ruler Per Spread" will position the zero point at the upper-left corner of the entire spread.

"Ruler On Spine" will position the zero point at the upper-left corner of right-hand (recto) pages and the upper-right corner of left-hand (verso) pages.

Friday, May 20, 2011

How to resize pages in InDesign

Imagine you have a document consisting of a number of pages that contain text and images. Now you need to change the page size to be smaller or larger.

One way to do this is to choose File > Document Setup, change the page dimensions, and click OK. While this works, it gives you no control over where the extra page width or height is added or removed. The rule is that the page enlargement or reduction is performed equally on all four sides, except in the case of facing pages documents where the width change happens away from the spine.

But, in CS5, you can control this behavior. Instead of using Document Setup, select the new Page Tool in the Tool panel (third tool from the top). Next, select a "reference point" on the proxy icon in the left end of the Control panel. Then adjust the width and height fields in the Control panel. The reference point you've chosen will remain fixed, and the page will grow or shrink in relation to it.

I've found this very useful when creating tablet screens for the Adobe Digital Publishing Suite. One option with the Digital Publishing Suite is to create pages that are longer or wider than the tablet screen, allowing the user to swipe up and down or left and right to view a single long (or wide) "page". It can be really handy to create a 1024px x 3000px long page, add the page content starting at the top, and then just shorten the page from the bottom when finished. The technique above makes this painless!

Friday, May 06, 2011

The future of newspapers

If you're in the newspaper biz, whether a small-market weekly or a metro daily, you owe it to yourself to listen to InDesignSecrets Podcast 148. The main feature of the podcast is an interview with my friend Russell Viers. Russell is a trainer and consultant who has specialized in the newspaper market for many years. The interview is a riot, but beyond being entertaining, Russell has some pointed observations about where newspapers are headed and what they can do about it.

I'm looking forward to catching up with Russell in a couple of weeks. Both he and I are speakers at the InDesignSecrets 2011 Print & ePublishing Conference.

Thursday, April 28, 2011

Acrobat 8, 9, and X compared

I'm often asked "what's new in Acrobat X, and should I upgrade?" Rick Borstein has put together a comprehensive comparison chart showing what's new in the 8, 9, and X versions here. Thanks Rick!

Keep in mind that Acrobat X is included in the new Creative Suite 5.5 upgrade, as a standalone product in Pro (Mac or Windows) or Standard (Windows only) versions, or in a Suite version of its own, the Acrobat X Suite.

Thursday, April 21, 2011

Selecting objects behind other objects in Illustrator

Illustrator CS5 offers a new, simplified way to select an object that is behind, or underneath, another object. Just hold down command (Mac) or ctrl (Windows) and click repeatedly on the top object until the object behind is selected. This is a nice addition to Illustrator CS5 because InDesign has had this feature for many years.

Along with this new feature comes a new preference setting that could trip you up someday. Preferences > Selection and Anchor Display has an option to disable this shortcut. So, if you want to be able to use this, be sure that "Command Click to Select Objects Behind" is selected.

Tuesday, April 19, 2011

Free May issue of Wired for the iPad

Adobe has sponsored the May 2011 issue of Wired magazine for the iPad, so you can download the May issue free through mid-May. As an early adopter of the Adobe Digital Publishing Suite, Wired keeps pushing the boundaries of what can be done with this new software suite.

Just download the Wired app, and then launch it on your iPad. You will see a list of all the issues available to purchase, and you will see the May issue listed as free.

See the Adobe Digital Publishing blog for more info.

Tuesday, April 12, 2011

2 new iPad apps

I'm thrilled to announce two iPad apps that I've been heavily involved with as a developer have finally made it to the App store. Both of these FREE apps were created with Adobe InDesign CS5 and the Adobe Digital Publishing Suite.

Lynn Phelps was the Art Director responsible for the beautiful layouts of both of these apps. I did the technical production, interactive elements, and application development.

Paul Crosby, Architecture In Sight is a showcase of the work of architectural photographer Paul Crosby, presented in "coffee table book" format. For this application, we elected to keep it simple, and let the amazing photography speak for itself, so there is limited interactivity.

The Minnesota Conservation Volunteer magazine Sense of Place issue is a special iPad edition of Vol. 73, No. 433 of this wonderful magazine. The iPad edition is jam-packed with bonus content: literally hundreds of beautiful nature photographs from well-known photographers such as Jim Brandenburg, Layne Kennedy and Richard Hamilton Smith; bird calls from the Cornell Lab of Ornithology, and many interactive elements.

See the Digital Publishing Gallery for a list of the 230+ apps that have been created to date using the Adobe Digital Publishing Suite.

Contact me if you have content that you want to publish to the iPad, Android tablets, or the Blackberry Playbook. I can show you how to do this yourself...or, if you prefer, I can manage some or all of the production.

Monday, April 11, 2011

CS5.5 announced

Today Adobe announced Creative Suite 5.5. If you'll recall, CS 5 was announced April 12, 2010 and began shipping on April 30, 2010. Adobe has indicated that their intent is to ship a new version of the Creative Suite every 2 years, with a mid-cycle "dot release" to address current technology changes and trends.

See Adobe.com and Adobe TV for a good overview of the new features and capabilities suite-wide. See InDesignSecrets for a good rundown of the new features in InDesign CS 5.5.

Bottom line: The update contains Acrobat X, changes to InDesign, InCopy, Flash Catalyst, Flash Professional, Dreamweaver, After Effects, Audition, Device Central, and Media Encoder, as well as a new (optional) subscription pricing model, and integration of the Adobe Digital Publishing Suite. Note specifically that this update doesn't add any new features to Illustrator or Photoshop.

Friday, April 08, 2011

How to batch print PDF files

Say you've got a bunch of PDF files that you want to print in alphabetical order. Windows Explorer allows you to select multiple PDF files, right-click and choose Print. Unfortunately, this command seems to print the files in a random order, not alphabetically. On the Mac, I don't know of a similar command in the Finder.

Fortunately, there is another way. Just follow the steps below.

Acrobat 9

1. Run Adobe Acrobat 9

2. Choose Advanced > Document Processing > Batch Processing

3. Select Print All and then click the Run Sequence button

4. Click the OK button in the Run Sequence Confirmation dialog box

5. Navigate to the folder containing your PDF files, and open the folder. Click on the first PDF file you want to print, hold down the Shift key, and select the last PDF file. Then click the Select button.

Acrobat X

Acrobat X replaces "Sequences" with "Actions", and unfortunately doesn't include a built-in "Print All" Action. So you will need to create one.

1. Choose File > Action Wizard > Create New Action

2. Fill in the "Create New Action" dialog box as shown below.

3. Click the Save button.

4. Give the Action a name, such as "Print" and click the Save button.

5. Now each time you want to batch print PDF files with Acrobat X, just File > Action Wizard > Print, and follow the on-screen prompts.

Monday, March 28, 2011

Need Photoshop CS5?

My friend Gloria has a brand new, shrink wrapped copy of Photoshop CS5 Extended for Windows that she wants to sell. I told her I'd help her get the word out. This is your chance to pick up a genuine, full version (not an upgrade) of Photoshop at a great price! Contact her at 651-491-2336 for more details.

Friday, March 18, 2011

Copyfitting InDesign text

I'm in Abuja, Nigeria this week doing InDesign and InCopy training for one of the media companies here. One of the things that I've taught is the various ways to make text fit a fixed amount of space in InDesign.

Here's a list of the ways that I can think of to adjust body text so that it will become slightly shorter or longer to fit a fixed amount of space...

1. The best way to copyfit, (without affecting the typography) is to edit the text. An InDesign-InCopy workflow makes this really slick, allowing a copy editor to edit the text to fit the space in the context of the InDesign layout.

2. Select all the text, and apply a tiny tracking adjustment to the text. Do this with the control panel, the character panel, or the following shortcuts:

Macintosh:

option-left arrow/right arrow (to adjust tracking by the amount set in preferences)

command-option-left arrow/right arrow (to adjust tracking in 5x greater increments)

Windows:

alt-left arrow/right arrow (to adjust tracking by the amount set in preferences)

ctrl-alt-left arrow/right arrrow (to adjust tracking in 5x greater increments)

3. Select all the text, and adjust the word kerning by a tiny amount. Do this with the following shortcuts:

Macintosh:

command-option-delete (to remove space between words)

command-option-\ (to add space between words)

(add the shift key to multiply the amount by 5)

(command-option-q will reset the tracking and kerning values back to the default)

Windows:

ctrl-alt-backspace (to remove space between words)

ctrl-alt-\ (to add space between words)

(add the shift key to multiply the amount by 5)

(ctrl-alt-q will reset the tracking and kerning values back to the default)


4. Select all the text, and adjust the horizontal scaling by a tiny amount. Use the fields in the control panel or the character panel to do this.

Obviously, you could also adjust the type size or the leading, but both of these affect the appearance much more that the 4 methods listed here.

Keep in mind that doing a couple of these things in small amounts, rather than just one of the things in a large amount, will usually be less noticeable. In a perfect world, you wouldn't need to do any of them, but in narrow newspaper columns, under tight deadlines, these measures are often inevitable.

Thursday, March 10, 2011

Incredible workflow enhancement tool

[The following is a "guest post" by my friend Ed Klemz from Central Coast Solutions.]

There is an incredible FREE web tool you need to know about – Wolfram|Alpha: Computational Knowledge Engine. Its a color selection and analysis tool, and so much more!

This web site brings together certified information from EVERYWHERE - all scientific, statistical, mathematical, political, medical, all of it. And this isn't "wiki" data that has no basis in fact, only certified and highly scrutinized data gets to be referenced. See About Wolfram|Alpha to learn more about this tool, and how it came to be.

You present equations or terms to Wolfram|Alpha, and it gives you the answers. The depth of information here is nothing short of ridiculous, and this should be the home page for any research person, marketing trend guru, or anyone who wants to know the most common baby names in the US...

What about color you ask?
Since the entire knowledge base of human experience has been made available us in this tool, what happens if you enter something like "html green"? Why it tells you everything you want to know about it, including complementary colors, values of RGB, HEX, HSB, nearest web and Pantone equivalents...very handy.

Now enter "RGB 249, 86, 2" and see the stats, and note that it is Pantone 1655 - my favorite orange. On the "Representations" block, click the "More" button and see its CMYK value as well. Now we are getting somewhere!

Wolfram|Alpha is a lot more than just information
Its computational, meaning it can do math with your inputs. So red + green = olive. You get the picture.

Its all about workflow
Many top designers, art directors and brand managers have a set of colors worked out for developing their client's branding guidelines that show the RGB, CMYK, HEX (web) and Pantone values of each, and restrict the color set to colors that have equivalents across all four color spaces. This one simple thing streamlines your workflow and makes color perform from print to web with no variations.

Now go and Explore! To say this is the tip of the iceberg is a gross understatement.

-Ed

Wednesday, March 02, 2011

Preventing a compound word from breaking at the hyphen

Amy wrote and asked:

Is there a way to set InDesign to keep "ACME-PRO" together and not insert a line break after the hyphen?

There are at least two ways to accomplish this:

1. Type ACME-PRO with a discretionary hyphen at the beginning (immediately before the A). A discretionary hyphen is typed as command-shift-hyphen (Mac) or ctrl-shift-hyphen (Windows). Then replace the hyphen between the E and P with a non-breaking hyphen, typed as command-option-hyphen (Mac) or ctrl-alt-hyphen (Windows).

or

2. Select ACME-PRO and format it with the "No Break" character attribute, located in the Control panel menu.

Method number one is preferable, since it is visible, permanent, and it doesn't create a character or paragraph style override.

Either of these solutions could be applied throughout a document quickly with Edit > Find/Change.

Tuesday, February 15, 2011

Spring speaking engagements

Spring is just around the corner, and with it, an increasingly busy schedule. Here are three local events I'll be speaking at, as well as an event in Washington DC that you should consider joining me at.

March 24: AAF Central Minnesota Professional Development Luncheon in St. Cloud, MN: 5 Things Every Designer Must Know About the Adobe Creative Suite

April 28: MMPA 2011 Magazine Summit in Minneapolis, MN. I'll be presenting 2 sessions at the Summit: Repurposing Magazines for Tablet Devices and Adding Interactivity and Multimedia to Magazines with InDesign CS5

May 12: National Association of Government Communicators 2011 Communications School in St. Paul, MN. I'll be presenting one session: Designing for multiple outputs: iPads, Kindles, e-readers, tablets, Web sites, and smartphones

May 23-24: InDesignSecrets 2011 Print and ePublishing Conference in Washington DC. I'll be presenting two sessions: XML and InDesign Demystified, and Data Publishing with InDesign. I'll also be hanging out to answer questions throughout the conference. This conference is going to be great...don't miss it. Mention code DCKG523 to receive $25 off the conference registration.

Monday, February 14, 2011

Adobe Forms Central

Today Adobe announced Adobe FormsCentral. This is a solution for creating HTML forms, distributing them, collecting responses and analyzing the data.

I haven't tried FormsCentral yet, but I know that many of my readers are involved with Acrobat, LiveCycle or HTML forms to one extent or another, so I thought I'd give you an early heads up. It will be interesting to see how this stacks up agains similar cloud-based form and data collection solutions.

For more information, read this post from the Acrobat Solutions team.

Thursday, February 03, 2011

iPad layout templates for the Adobe Digital Publishing Suite

Designing in Adobe InDesign CS5 for the upcoming Adobe Digital Publishing Suite entails creating a document that's 1024 x 768 pixels or 768 x 1024 pixels. But the Adobe Viewer obscures a 6 pixel vertical region on the right side of the screen with a vertical scroll indicator, and the Viewer "chrome" that appears when the user taps occupies 44 pixels at the top and bottom of the screen.

I've created a couple of simple CS5 template files, one for each orientation, that mark these regions with guides, have the measurement system set to pixels, and the transparency blend space sent to RGB. For more information, read the explanatory notes on the pasteboard of page one in the templates.

You may download the free templates here. I hope you find these useful!

Tuesday, February 01, 2011

Selecting objects outside an Illustrator clipping mask boundary

Starting with Illustrator CS4, objects that are masked but extend out of the mask boundary can't be easily selected. Usually, this is intuitive, and a good thing. But sometimes you need to be able to easily select these objects outside the clipping mask boundary. This can be done, but it's far from obvious how. Sure, selecting View > Outline lets you see the objects outside the mask boundary, but you can't directly select them.


Here are 3 ways to do this:

1. The Edit Contents/Edit Clipping Path buttons in the Control bar. Clicking the Edit Content button (or choosing Object > Clipping Mask > Edit Contents) selects all the masked contents. You can then double-click on any of the objects to edit them in Isolation mode

.


2. The Lasso tool. Dragging around masked objects with the Lasso tool selects them, even when they fall outside the mask boundary.


3. The Layers panel. Twirling open the group containing the clipping path in the Layers panel will let you access each masked object. Click the round circle to the right of any object to select it.